Using keyframePlayer
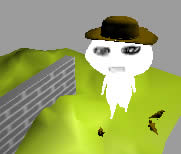 This tutorial assumes you have completed my others in the series. You'll need to start with characteranim.dir, which has the shockwave 3D cast member with animation in the form of movement in the legs and arms. I've also included another model, a hat, which you can see in the pic on the left.
At the top, you'll see:
global gWearHat
property pTofuBB, pHatBB
property pCamera, pFlip
I have a global variable, gWearHat, which will define when the character is wearing the hat. Properties pTofuBB and pHatBB are the bounding boxes for the tofu character and hat models respectively. The pFlip variable is one that will flip the movement depending on which camera angle you' re using.
Scroll down the behavior. In the beginSprite handler, we have:
hat = pMember.model("hat")
Here we set the hat local variable to the related model.
After we've defined the hat model, we create a hat bounding box, starting with a model resource as follows.
-- create tofu bounding box tofuBB_MR = pMember.newModelResource("tofuBox",#box)
tofuBB_MR.height = 25
tofuBB_MR.width = 25
tofuBB_MR.length = 50
pTofuBB = pMember.newModel("tofuBox",tofuBB_MR)
The above numbers relate to the proportions of the tofu. If you were doing this with your own model, you' d need to keep track of the units in your 3D application. In my case, it was 3DS Max. You could create the bounding box in your 3D application to avoid the need to do it via Lingo as I have.
Next we have:
pTofuBB.worldPosition = tofu.worldPosition
pTofuBB.worldPosition.z = 23
This locates the Tofu character Bounding Box in the scene. I moved the z co-ordinate up 23 units. Otherwise my character would sink through the ground. Again, doing this in the 3D application would have been simpler.
We then have:
invisShader = pMember.newShader("invisShader",#standard) invisShader.transparent = TRUE invisShader.blend = 50 ptofuBB.shaderList = pMember.shader("invisShader")
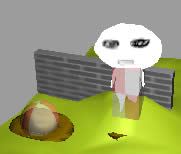 The above creates a new shader that is meant to be invisible. I have set the blend to 50 so that we can see the bounding box (as seen in the pic). We'll change it to 0 later. The pic shows the bounding box (sphere) for the hat, which we'll create later.
The primary benefit of these parent-child relationships is that they make it easier to move complex models around in the 3D world and to have the component parts of those models move together in the proper way.
Hopefully that will make sense in the context of this tutorial. After the line:
-- create parent child relationships
insert
ptofuBB.addChild(tofu, #preserveworld) ptofuBB.addChild(pMember.model("armR"), #preserveWorld) ptofuBB.addChild(pMember.model("armL"), #preserveWorld) ptofuBB.addChild(pMember.model("legR"), #preserveWorld) ptofuBB.addChild(pMember.model("legL"), #preserveWorld)
In the above code, we made the character bounding box the parent of a number of child models. In a parent child relationship, you can link multiple child objects to a parent but each child can only have one parent. The child objects are the tofu character, and the arms and legs.
3. Let's inspect some other code I have.
-- create hat bounding box hatMR = pMember.newModelResource("hatSphere",#sphere) hatMR.radius = 18 pHatBB = pMember.newModel("hatSphere", hatMR) pHatBB.worldPosition = hat.worldPosition pHatBB.shaderList = pMember.shader("invisShader") pHatBB.addChild(hat, #preserveWorld)
By now, I' d hope the above would all make sense to you. So, I won' t say anything more.
4. You can scroll through the more code which should all be clear. Finally, you'll get to:
-- set starting motion speed
Follow this statement with:
pMember.model("armR").keyframePlayer.playRate = 0 pMember.model("armL").keyframePlayer.playRate = 0 pMember.model("legR").keyframePlayer.playRate = 0 pMember.model("legL").keyframePlayer.playRate = 0 pMember.registerForEvent(#timeMS,#SetCollision,me,2500,50,0)
The keyframe playRate is a property which defines how fast or slow to play back the keyframe motion. A value of 2 would double the speed, 0.5 would halve it. A value of 0, in our case, sets it to a paused state.
The keyframePlayer registers 2 events - #animationStarted and#animationEnded. And these can be used by handlers declared inregisterforEvent()
5. Scroll down to the keyDown handler and look though the code, which should all make sense. Note the statement:
if keypressed(8) then changeCamera
This means that if the character c is pressed, the changeCamera custom message will be executed.
6. Scroll down to the changeCamera handler.
See the code:
pCamera.rotate(0,0,180,pTofuBB) -- when the camera rotates 180, flip the arrow direction as well pFlip = pFlip*-1
What' s happening here is that the camera rotates 180 degrees and the pFlipvariable is multiplied to -1. pFlip will become negative it if was positive or positive if it was originally negative.
7. Scroll up to the keyUp handler. After the pDownArrow statement, add:
pMember.model("armR").keyframePlayer.playRate = 0 pMember.model("armL").keyframePlayer.playRate = 0 pMember.model("legR").keyframePlayer.playRate = 0 pMember.model("legL").keyframePlayer.playRate = 0
This sets the leg and arm movement to a paused state when the any key is released.
8. Scroll back up to the exitFrame handler, and at the start you'll seeSetMoving. This is the custom message to define the movement of the character when a key is pressed. Now scroll down to the SetMoving handler.
At the start, insert the following code:
if pRightArrow then pTofuBB.rotate(0,0,-5*pFlip) if pLeftArrow then pTofuBB.rotate(0,0,5*pFlip)if pUpArrow then
pTofuBB.translate(0,-5*pFlip,0,#self)
pMember.model("armR").keyframePlayer.playRate = 1
pMember.model("armL").keyframePlayer.playRate = 1
pMember.model("legR").keyframePlayer.playRate = 1
pMember.model("legL").keyframePlayer.playRate = 1 end if
if pDownArrow then
pTofuBB.translate(0,5*pFlip,0,#self)
pMember.model("armR").keyframePlayer.playRate = 1
pMember.model("armL").keyframePlayer.playRate = 1
pMember.model("legR").keyframePlayer.playRate = 1
pMember.model("legL").keyframePlayer.playRate = 1 end if
9. The code that you'll see in the rest of the SetMoving handler just moves the character up and down the terrain using the modelUnderRay technique. It is explained in the Terrain following tutorial.
10. Scroll down to the SetCollision handler. In here, I have code that uses themodelUnderRay technique to test when the character collides with objects. But I have included 2 bits of collision scripting. One collision detect will activatecheckObjectFoundDistance, the other checkForCollision.checkForCollision is exactly as described in the collision detection tutorial.checkObjectFoundDistance is what' s used for finding the hat.
11. Scroll down to checkObjectFoundDistance handler. Here we check the distance from the starting point of the ray to the hat and if the distance represents a collision, gWearHat becomes TRUE.
12. Scroll backup to the exitFrame handler. After the SetMoving statement add:
if gWearHat = TRUE then
ptofuBB.addChild(pHatBB,#preserveParent)
pHatBB.worldPosition = pTofuBB.worldPosition
pHatBB.worldPosition.z = 87 gWearHat = FALSE end if
Following the result of step 11, we now have gWearHat being TRUE and so we make changes accordingly. The hat bounding box is made a child of the character bounding box so that when the character walks, the hat will not be left behind. We change the world position of the hat to correspond to the bounding box of the tofu character. Then we move the hat up 87 along the z axis so it sits on the character' s head. We must set gWearHat back to FALSE otherwise theif gWearHat = TRUE will be put into a infinite loop. The variable can' t be set back to TRUE since the ray that was created to detect the hat is downwards below the character' s head.
13. Now it's time to play the movie and see how it all works. Notice the bounding boxes. To make them completely invisible, change the blend to 0. This was referred to at the end of step 1 just before step 2.
Another thing to note is that when you press c, you can toggle between a camera looking from behind and in front. But, no matter what camera view you're using, the up arrow will always move the character up the screen, down arrow will move it down. You can download the completed movie from here.
If you're wondering why I used a global variable for gWearHat (it could have worked as a property variable like the others used), you can email me or check back this page in the near future as there is a planned addition.
How the legs and arms were set up in 3DS Max
In Max, the arms and legs were animated as individual objects in a keyframed manner. Lingo made them a child to the body. Often, character animation is created using mesh deformation using a skelteton or bones hierachy. For more info on biped and bones animation setup in Max, look at the Preparing 3D content for Shockwave 3D technote (for general info) and the Character Animation for Shockwave 3D article (detailed info).


0 comments:
Post a Comment